How to Roll a 7 Gram Christmas Tree Joint
- Kat Ziger
- Dec 19, 2024
- 2 min read
‘Top Up’ your rolling skills with a Christmas tree that you can actually ‘Smoke Up’
Estimated Rolling time: 40 - 60 minutes
Materials Needed
7 - 8 grams of grinded cannabis
1 pack of King Size rolling papers
Wide filter tips
1 medium sewing needle (eg. nail)
1 large sewing needle (eg. larger nail)
Water and Brush (or not, your preference)
Scissors
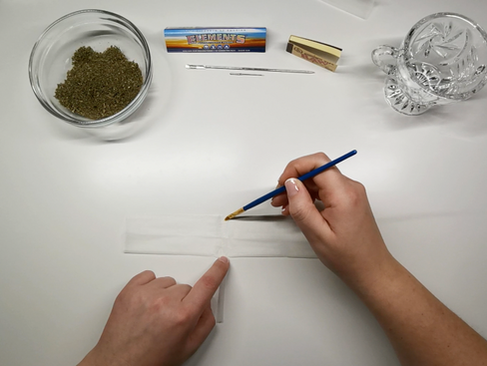
Part 1: Size Up the Rolling Paper
Align the King Size Papers side by side lengthwise to make one very long paper
Cut off the glue side of a few rolling papers to use as ‘tape’
Use brush to apply water to seal each side of the paper together, nice and strong
Cut off excess glue paper


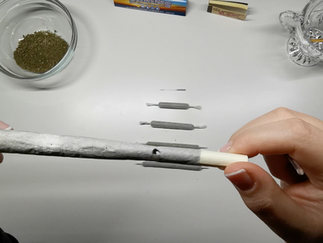
Part 2: Roll the Main XL Joint
Using 2 wide tips, create one fat filter to use in this joint
Using to bowl to brace the joint from falling, fill the joint as much as possible
Spread the cannabis evenly from the tip to about ¾ of the joint
Roll it up tight & as straight as possible
Seal with water and brush


Step 3: Roll x4 Joints of Different Lengths
Prepare 4 rolling papers.
Roll 4 joints of increasing length (from smallest to widest part of the tree).
Keep them as straight as possible. (you can use a filter tip as a guide)
Twist both ends of the joints to close.


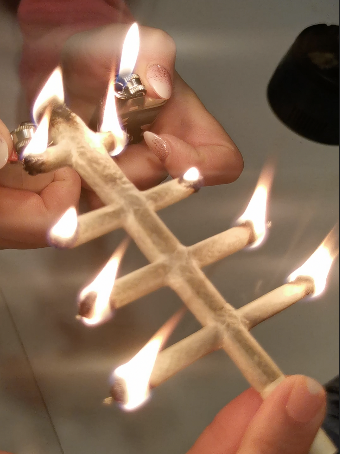
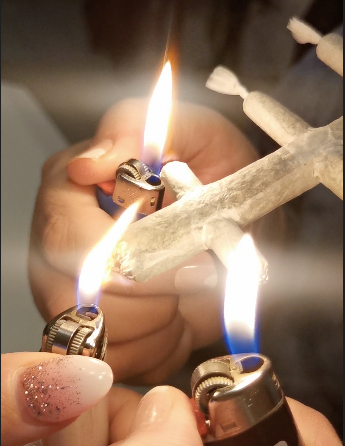
Part 4: Assemble the first Cross Joint
Line up your joints from shortest to longest evenly spaced.
Lay the XL Joint on top of them.
Using the small needle poke holes along the XL Joint to mark where each smaller joint will go.
Use the small needle to puncture the first hole all the way through the XL Joint.
Use the large needle to enlarge the hole wide enough to fit one of the smaller joints.
Insert joint (you can use a filter tip to help push through the hole) and slide through the XL joint carefully.
Repeat step 5 if the hole is not big enough.
Before completely inserting the smaller joint, using the small needle poke a hole through the middle to create an ‘airway’.
Twist and align the hole with the XL Joint. (see video for reference)
Using the glue side of a few rolling papers, tape across both joints to seal them together and prevent air pockets.


Take your time and seal tightly, if there are air pockets the joint won’t pull properly! This is crucial!